
The following procedure is for anodizing aluminum parts. Anodizing will protect the aluminum parts by making the surface much harder than natural aluminum, aluminum oxide is grown out of the surface during anodizing and is extreemly hard. The porous nature of the anodized layer allows it to be dyed any color that is required. The method I describe is type II anodizing (room temp) and gives a anodized layer of .0002" to .0006". Type III or hard coat anodizing is done at much lower temperatures at higher current levels and gives a anodized layer up to .002 but is normaly at .0005" (Mil spec) in most anodizing shops. Type 2 anodizing using the home brew hanging wire method can be done quite easily at home with materials found at typical hardware and auto parts stores. I wish to share the procedure that has worked for me over the years. Please email any suggestions or questions concerning this procedure to Ron Newman
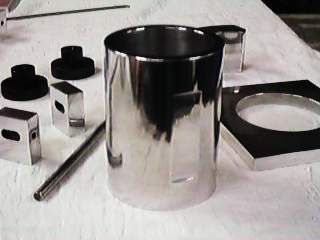
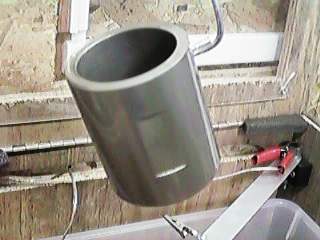
The sample part in this case is a freshly machined Crayford focuser tube. The photo shows the 6061 aluminum alloy tube polished and ready to be anodized and dyed black.
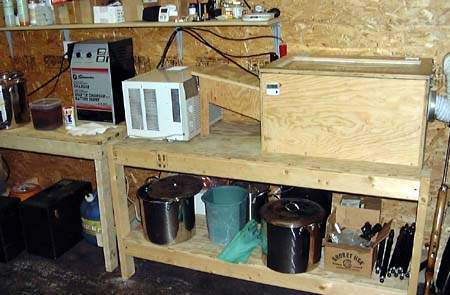
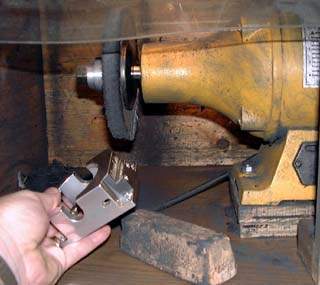
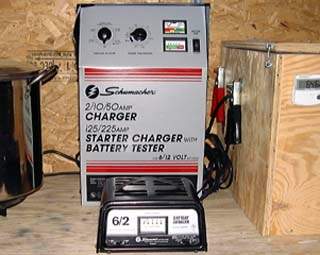
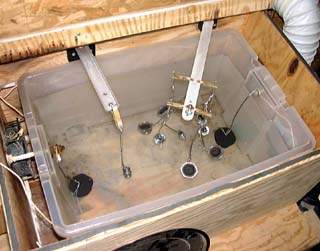
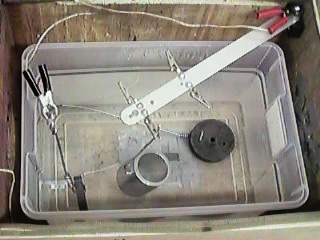
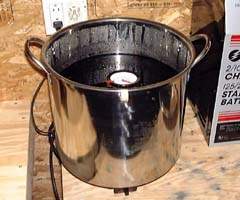
The following photos show my anodizing station set up-- Plastic tank for sulfuric acid in a sealed vented wood box, Power supply, AC unit, and dye.
Before we get to the anodizing part lets talk about preping the aluminum part first----------
Anodizing hides no sins, so put a good finish on your parts before anodizing them. For the most part, what you see is what you get after the part is anodized; however, anodizing does tend to slightly magnify the surface texture, so lean toward a smoother finish when prepping the part, knowing that a small amount of the gloss will be lost after it is anodized. For a glossy surface on your anodized part, steel wool or wet sand it, and then polish with a buffing wheel using tripoli compound. For a matte finish just steel wool or sand it. You can also achieve a very uniform low reflective matte finish by sand blasting the part before anodizing it. There are other non manual ways to prep the parts surface before anodizing. I use vibratory tumblers with different grades of media for sanding and polishing the parts before anodizing. This allows a large quantity of parts to be done easily. But for quick "one off" parts, buffing on a polishing wheel using tripoli compound is the quickest. Or you can just anodize the part right after machining it, just make sure you clean it first. Here is a photo of parts that came right off my home made mini CNC lathe, cleaned, and anodized. No prep work was done at all.
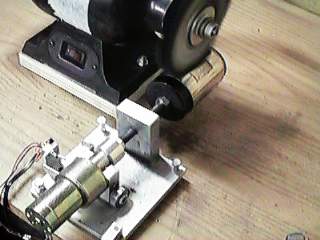
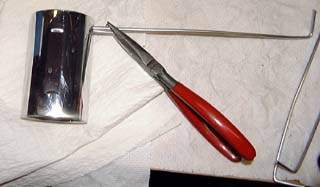
Here is a simple motorized polisher that will put a mirror-like finish on the focuser tube. Or you can just buff the part by hand using tripoli compound.
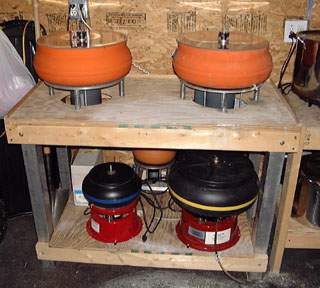
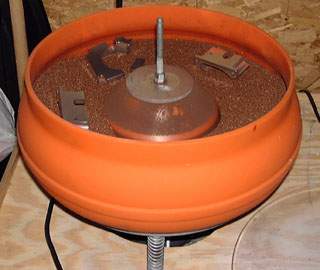
This is my vibratory tumbler set up. I use 3 vibratory tumblers. Each tumbler is dedicated to a different type of media. The first tumbler has 40 lbs of plastic triangle media impregnated with silicon carbide to sand the parts. The second tumbler uses polishing media that produces a semi-gloss finish. The final tumbler uses rougue treated walnut shell which produces a bright mirror-like surface. Each tumbler sequence takes between 24 to 48 hours to prep the surface. It's slow but many parts can be done with out supervision or sweat. The tumblers and the media in them are not cheap, so unless you need to do hundreds of parts at a time, I would suggest buffing them by hand.
-----Striping or restoring existing anodized parts-----
You can strip off the anodized layer of any anodized part by placing the part in a Lye solution for an hour or so. Just mix up a few table spoon of lye and water in a plastic container. Wear eye protection and rubber gloves for this procedure!! Place the part in the solution and monitor its progress.
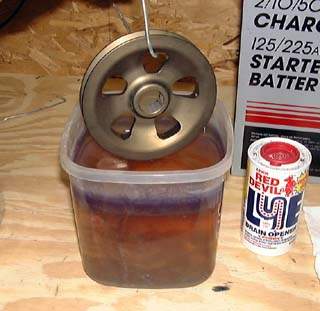
The lye will desolve the old anodized layer, about .0005" thick. It takes a while for it to start breaking through the layer. It's a little slow at first so the first ten minutes or so not much action will be seen. Bubbles and smut will rise up to the top as an indicator of its progress.
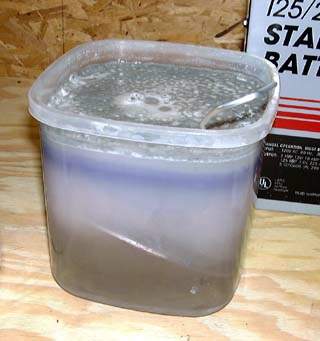
It's a good idea to help the process along by wiping the smut off of the part to allow the acid to get to fresh aluminum. Just wipe it off with a rag every 5 to 10 minutes until the old layer is completly gone. Only bare aluminum should be seen when it is finished.
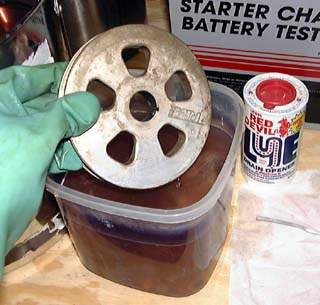
When it is completly uniform (no remaining spots) just rinse it off and buff it back to a shine. Striping aluminum this way will create a matt finish. Polishing it back to it's original surface is up to you. At this point the part can be reanodized and dyed any color just like a freshly machined part. Note: if the aluminum part has other metal steel parts press into it Do not reanodize the part. Metal other than aluminum will desolve away during the anodizing process. I have removed broken taps this way just by anodizing the aluminum part. The steel tap is gone after anodizing the part. It just burns it right out.
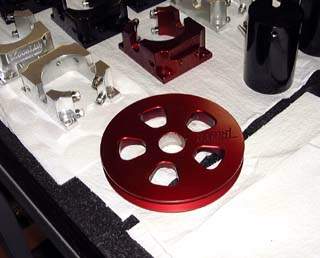
Here is the reanodized part!
OK. Enough about prepping and striping parts. Let's get to the anodizing part.
The aluminum parts need to be clean. Oil from machining, polishing compound, and fingerprints from handling the parts must be cleaned off. I use dish detergent with hot tap water and scrub the part. Use a tooth brush to get into any tight corners if needed. You can use any degreaser you want. just make sure the part is really clean!
Next, I connect an aluminum hanging wire to the part. This will provide the electrical connection when anodizing. I force thread the wire into an existing tapped hole. Just double the wire up, or pound it to a point to fit your tapped hole. This connection must be very tight or it will fail during the anodizing process. Use pliers if needed to crank the wire into the hole. The wire is softer than the aluminum alloy and will simply take the shape of the hole with out damaging the threads in your part. Remember, wherever the wire touches the part, it will not anodize and will not take any dye. Pick the connection spot so it will not show on the finished part.
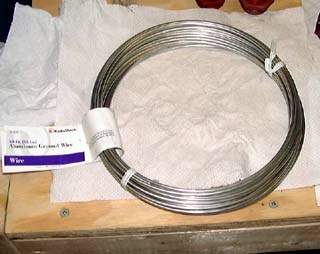
You can buy aluminum 12g wire from Radio Shack for this purpose.
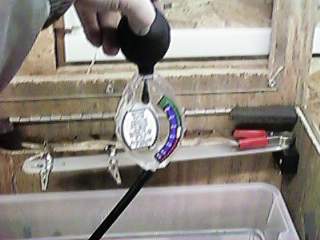
Mix up a solution of sulfuric acid in a plastic container. I mix about 2 gallons of battery acid to about 5 gallons of water. Then measure the specific gravity using a battery acid tester. It should display about 1100. That reading, if testing a real battery would indicate a discharged battery. Adjust the solution as needed. You can source sulfuric battery acid at your local auto parts store. Wear Eye protection and rubber gloves when working with sulfuric acid!
A battery charger or a DC power supply capable of providing at least a few Amps of current is required. A small set up can use a 12 volt 6 amp battery charger, but I use a 12 volt 50 amp charger/starter on the large tank. It puts out about 20 volts on the highest setting and will provide up to 50 amps. The larger the current draw, the faster the part will anodize. But to much current can burn off the hanging hookup wire. Anodizing at high current can also burn the part. Well it's not really burning it, the problem is caused by the bubbles etching the top or an edge of the part making it look pitted. High current anodizing also causes higher temps in the tank that can also cause the parts to pit. So don't try anodizing to fast at high curent levels unless you have some experence with the process.
I anodize multiple parts at a time, drawing between 5 to 12 amps on most occasions. That seems to be a good all around range for the size of parts I do. It takes about 65 minutes no matter how many parts I do at a time with my setup. The more parts I add in the tank the more current is drawn from the Power supply.
The tank also has an electronic temperature gauge to provide a means of monitoring the temperature of the acid to make sure it does not exceed more than 80 degrees F while anodizing. The temperature of the acid typically raises about 7 degrees for each hour of anodizing, depending on how much current is being drawn and how large the tank of acid is. The anodized part will not take the dye well if the temperature of the part is too high while anodizing, or if it is rinsed with hot water after anodizing. The ideal temperature range is between 65 and 75 degrees for type II anodizing, and around 40 degrees for hard coat anodizing. If the temp gets to high while anodizing the parts may start to pit. I have an AC unit blowing into the sealed box to cool the acid down as low as I can before starting an anodizing run. Once the acid reaches about 65 degrees I know I can start and complete a large number of parts before the temp gets into the high 70s and forces me to stop and wait for it to cool down again. You don't need to have an AC unit like I do if you are only doing a few parts. Just place some ice cubes in the acid to get the temp down before starting. Anodizing in the summer time in a garage can be a challege.
Put a piece of lead in the tank of acid and connect it to the negative side of the charger. If the lead does not stick out of the acid you can use a heavy gauge ALUMINUM wire connected to the lead plate to provide an electrical connection above the acid. I used two lead plates, one on each side of the tank wired together. No metal of any other kind should touch the acid.
Suspend the aluminum part in the acid using the attached aluminum hanging wire. Connect the positive terminal of the charger to the wire holding the part and turn on the charger. The part should not touch the plastic container or be placed too close to the lead in the tank. Don't place the part directly over the lead plates due to the bubbles rising up from the lead.
If the electrical connection to the part is not tight, it will fail during the process and only the aluminum hook up wire will be anodized, not the part. The current should rise then level off in the first few minutes of anodizing. As the anodized layer builds on the part you may notice a small drop in current. This is normal; however, if the current drops suddenly during the process that indicates that the connection to the part has failed. If the current is too high, the connection wire may burn off. Use a 12-gauge wire when possible for the hanging wire. If the current keeps rising as the part anodizes then check the temp. The hotter the acid gets the more current will be drawn. Remember the temp has to be kept with in limits or your part may become pitted and won't take the dye well.
Bubbles will start foaming off both the lead plates and the part. I would advise not breathing the hydrogen fumes and bad vapors, and would suggest some way of venting them away from your work area. I put the plastic tank in a sealed wooden box with a fan to vent the fumes out a nearby window using a simple dryer hose. Some anodizing kits provide fume control balls that take care of the problem. I have not tryed them, but hear they work well.
Figure out how long to anodize the part using the following rule- 900 amps per minute per square foot of part.
The Crayford focuser tube has 42.4 sq " of surface and is drawing 5 amps according to the meter on the power supply. 900/5 =180 amp min, and 42.4/144 = .294 sq'. So 180 times .294 = 53 minutes in the tank. This part anodized for 1.2 hours. Give extra time for parts that have a matte finish. Due to the larger surface area of a matte part, it will take a little longer to anodize then the same size part with a polished surface. To be honest, I don't even bother to figure out the time required for parts any more. I know my set up well enough to just set the timer for 65 minutes and let it go. The current will automaticaly adjust for more or less parts. Other anodizing set ups will differ due to different battery chargers and tank sizes. So calculating the time would be a good idea until you gain a little experience.
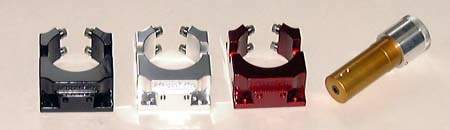
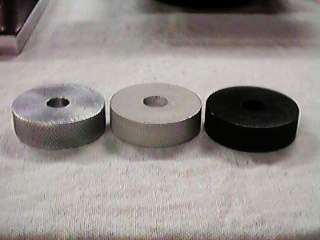
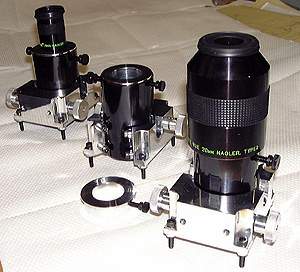
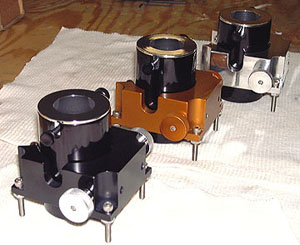
Notice the color of the anodized part. It should have a pale lemon tint if it is a 6000 series alloy, or a chalky whitish look for other types of aluminum alloy. Don't pull it out of the tank until it changes color. The following photo shows the color of 3 samples - natural aluminum, anodized, and dyed black.
Rinse the part with COLD water after removing it from the acid tank. Do not use hot water as it will start to seal the pores in the aluminum oxide layer before you have a chance to dye it.
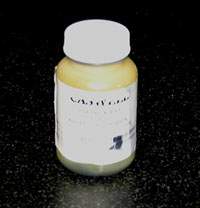
Once the part is rinsed well in cold water, it is time to dye the part to your desired color. I use different colored anodizing dyes from Caswell, but the bulk of my anodizing is done in black. Click below to see the different colors that they offer. They also sell anodizing kits, plating kits and vibratory tumblers as well.
Caswell pays me a small percentage for any sales I send them from my page. So if you are going to order something from them, please link from my page to them and then place your order, instead of from a book mark- Thanks! (End of shameless plug)
Mix 2 gallons of water to one bottle of dye, other brands may vary. Heat the dye to about 140 degrees F. Hang your anodized parts in the dye bath for 15 minutes. Mantain the temperature while the part is dying. Anodizing dye will last years if you are careful not to cross contaminate it with sulfuric acid from the anodizing step. Seal the container once you are finished.
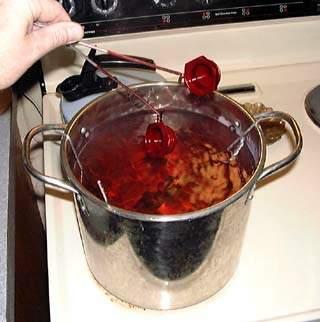
Now, it is time to seal the pores and lock in the dye by boiling the part in water for 20 minutes. You can also steam the part for 30 minutes by suspending it in a pot with a little water boiling under it. Steaming helps to avoid water spotting problems. If spotting is a concern, use distilled water in the dye bath and for sealing.
If you do not want to dye the part and just want to seal the natural anodized color, just skip the dying step and seal it like normal. The natural anodized color will change slightly.
After the part has boiled for 20 minutes, rinse it off and remove any dye powder residue that may be on it. Polishing compound or wax can be used to help remove any remaining residue or water spots.
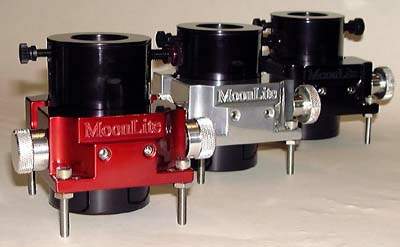
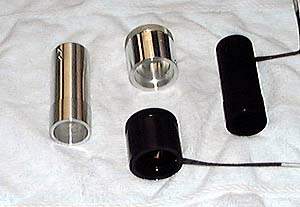
The finished product!